Experiences Producing a Screencast on Linux for CryptoTE
Posted on 2009-08-17 11:25 by Timo Bingmann at Permlink with 0 Comments. Tags: #linux #vncrec
While publishing screenshots for CryptoTE (nice cross-platform text editor with integrated cryptography) the idea of making a short tutorial screencast came up. A screencast is basically a video made directly from the computer screen with no camera involved. Usually speech comments are added to create a sort of impromptu screen presentation. Thus I could show off the cool features of CryptoTE, and people could see what the program is about without installing it.
So far the cool and very trendy idea, now for sorting out the technical difficulties in making such a video. In theory a screencast video should be well compressible with a lossless codec. Unresized screenshots in full-resolution are also better compressed using the lossless PNG format than with JPEG, the PNG files are much smaller and show no blurry edges. Similarly screencasts, being only a sequence of full-resolution, losslessly recorded screenshots with some little mouse-movement, should be compressed losslessly.
On the digital inspiration blog I found a detailed "Screencasting Software Guide - Review of Desktop Screen Recording Tools" for all platforms. However, because my primary operating system is Linux (and since I also wanted to show that in the screencast), the range of tools that actually work is very limited.
Capture Tools: Tried xvidcap, vnc2swf. Picked vncrec!
The first tool that popped up while searching was xvidcap. It is not related to the XviD codec, but derives its name from X Window. It is a small tool that can capture any activity on the X Window desktop into a variety of different formats. Among these formats are MPEG, MPEG2 and many other compressed formats supported through ffmpeg.
However, after a few trials it became clear that xvidcap was too slow. Even though it captured the screen only with 10 fps (frames per second), the encoding process or capture process itself was not fast enough for a perfect recording of screen activity. I had large frame drop rates and moving the mouse cursor didn't look very good with only 10 fps. I presumed that with so much computer power in present-day CPUs, a higher quality had to be achievable somehow. Some other minor problems occurred with xvidcap: dialogs popping up in the wrong places, and context menus went outside of the capture area.
After some research I found a very good solution: VNC (Virtual Network Computing) recording. Using VNC one can basically connect to a remote desktop and control the mouse and keyboard via the network. Due to prior experience with TightVNC, it was my software of choice and I quickly set up a secondary user account on my desktop computer. Another advantage of VNC and the secondary user account was that I could easily configure the X desktop to look pretty for recording at the uncommon resolution 800x700 pixel, which was needed to show all dialogs without clipping.
For recording VNC sessions there are multiple solutions, of which vnc2swf was the most commonly mentioned for creating screencasts. However, I had only lots problems with this software; the output files were enormous, there was no easy support for adding simultaneous audio and the basic version didn't even have a seek bar to jump back and forth in the video. Nevertheless, the idea of encoding RFB (Remote Framebuffer, the protocol behind VNC) messages as Flash operations is very good.
Much better suited for my purpose was vncrec. It fires up a normal VNC client session and records all mouse, keyboard and X11 display events in a .vnc file. Thus it essentially only records changes to the displayed desktop, exactly what I needed, and even in lossless quality. The .vnc files can be replayed using the -play directive.
Encoding: Examined Lossless Codecs, Resorted to MEncoder and x264
Next step was to convert the .vnc recordings into video files that are playable using a Flash video player. My favorite Flash video player is Flowplayer and a comprehensive guide to installing it is available on their website. Since Flowplayer uses Flash to play the video, the available codecs are limited to those supported by Flash. I discovered that Flash has a special lossless codec for "screen videos", it is labeled flashsv in the ffmpeg formats list. However, a few tests showed it to be way larger than a well compressed H.264 video. Using other encoding tools than ffmpeg did not show any improvement.
So I basically gave up on creating a lossless compressed version and resorted back to x264, because it is the currently most advanced free codec and H.264 video is supported by Flash. Thus the .vnc must be compressed to a .mp4 file. For this purpose I used the mencoder tool, part of the MPlayer suite. Mencoder cannot read .vnc files directly. Apparently transcode, an alternative Linux video tool suite, can read vncrec files via a plugin, however, the resulting quality was not agreeable. There seemed to be some problems in the RGB to YUV2 color-space conversion of transcode which resulted blurred dialog box edges.
The final solution was then to use an enhanced fork of the vncrec tool by twibright labs (local mirror). This version contains some YUV4MPEG2 export code which produces a good looking YUV2 raw stream. These streams can be directly piped into mencoder, without any intermediate files.
Vncrec has no support for recording audio simultaneously, so that must be done with an extra audio tool like Audacity or plain ALSA arecord. Using mencoder the resulting audio file can be encoded using FAAC and then multiplexed alongside the H.264 video stream.
Final Sequence of Commands
First launching a VNC server on the secondary user account. More work is needed to get a complete desktop up and running. The following few lines are only the basic steps to start the VNC server display on :1. SSH is used instead of su because otherwise lots of environment variables are kept from the primary user.
$ ssh <recording-user>@localhost
Password: <enter password>
$ vncserver :1 -geometry 800x700 -depth 24 -deferupdate 0
You will require a password to access your desktops.
Password: <some temporary password>
Verify: <same again>
Would you like to enter a view-only password (y/n)? n
New 'X' desktop is box:1
Starting applications specified in ~/.vnc/xstartup
Log file is ~/.vnc/box:1.log
$
Returning to the primary user account, one can connect to the VNC server using the recording client, or any other VNC client for that matter:
$ vncrec :1
VNC server supports protocol version 3.8 (viewer 3.3)
Password: <temporary password from above>
VNC authentication succeeded
After setting everything up for recording, connect using the VNC capture program.
$ vncrec -record screencast.vnc :1
VNC server supports protocol version 3.8 (viewer 3.3)
Password: <temporary password from above>
VNC authentication succeeded
Now to do the recording. All VNC actions are saved to screencast.vnc. Audio is not automatically recorded as well. To capture speech, plug in a microphone and record it simultaneously using an audio recording software. I found it convenient to first start audio and then VNC, and later synchronize both by deleting sound prior to the ENTER key following the VNC password entry.
To terminate the recording, press F8 and select "Quit Viewer" or just close the VNC window. This will correctly stop recording and flush the capture file.
After recording, the VNC server can be terminated. As the secondary user:
$ vncserver -kill :1
Killing Xvnc process ID 24148
The resulting VNC recording can be replayed like this:
$ vncrec -play screencast.vnc
Prior to encoding, the VNC recording can also be viewed directly by piping the raw YUV2MPEG into MPlayer, note the switch telling MPlayer the stream type:
$ VNCREC_MOVIE_FRAMERATE=25 vncrec -movie screencast.vnc | mplayer -demuxer y4m -
For stream editing it is most useful to create a raw file without delta frames. For this purpose the HuffYUV or FFmpeg HuffYUV codecs are best used. HuffYUV files can also be processed by Windows software.
$ VNCREC_MOVIE_FRAMERATE=25 vncrec -movie screencast.vnc | mencoder -ovc lavc -lavcopts vcodec=ffvhuff -o screencast-ffvhuff.avi -demuxer y4m -
Finally the video and speech audio file can be encoded using x264 and FAAC into a .avi file.
$ VNCREC_MOVIE_FRAMERATE=25 vncrec -movie screencast.vnc | mencoder -ovc x264 -x264encopts crf=23 -oac faac -faacopts quality=100 -o screencast-temp.avi -demuxer y4m - -audiofile screencast-speech.wav
For display on the web, the .avi file must then only be repackaged as a .mp4 Matroska container for display on the web using a Flash player.
$ MP4Box -aviraw video -out screencast screencast-temp.avi
$ MP4Box -aviraw audio -out screencast screencast-temp.avi
$ MP4Box -new -add screencast_video.h264 -add screencast_audio.aac -fps 25 screencast.mp4
Summary
With vncrec great screencasts can be made on Linux using a VNC server. However, the available lossless video compression techniques are not as far developed as lossy movie compression, so I resorted back to using the x264 codec. A special patched version of vncrec allows easy piping of the uncompressed picture stream into MPlayer. Using mencoder this raw stream can be converted into many different formats and simultaneous speech can be also added.
In the end most work when into scripting and recording a fluent screencast video, because the post-production editing facilities available are not very rich. The only tools available for that are Avidemux and Audacity. Maybe you will have more luck with Cinelerra than I did.
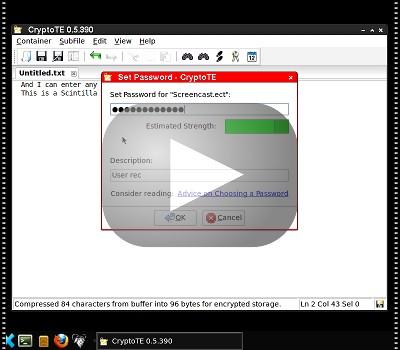
You can see the finished tutorial screencast about CryptoTE by following the image link below:

